Distributed Conference / Lecture Setup
Introduction
As we are facing the COVID-19 pandemic there is demand for online lectures,“virtual” conference or just teaching people online. We want to support such virtual conferences and enable speakers to give their talk from home live or recorded to put it online somewhere, for example on media.ccc.de or YouTube.
The setup below also works with commercial streaming service like YouTube or self hosted solution. This means it can be used without any dependencies on VOC infrastructure. One can also (at least on linux and windows) use it with telco services like jistsi, NextCloud Talk or Zoom, Skype,… (more on that under Fake Webcam).
Basic setup for speakers
For an optimal setup a speaker needs two screens. The speaker should position one screen at the same height as the camera, close to or below it. This screen should display the slides. This way the speaker, looking at their slides and notes, will also look at the camera.
The second screen runs OBS, the video mixing software we support, which captures the presentation screen as well as its camera and microphone. The speaker will decide to either stream the slides, the speakers face or a combination of two. A speaker can either switch beteen those, if they are comfortable doing so during the talk, or just use the combination of slides and face the entire time. More on how to do all this below. (Of course its also possible to do all this with one screen but can be a little tricky to fit everything on one or switch between apps).
With the provided OBS project (see below) a unified layout according to our best practices can be achieved.
- PC / Laptop with win/lin/osx and OBS
- 2 screens (or laptop + external display)
- Webcam
- Microphone
- 5Mbit/s or more upload
The following sections describe some of the finer points of your new “studio” skip those that are not relevant to you. You find a summary in the section “Your Studio”.
Improving video and audio quality
Here are some hints to improve the audience experience or work around missing hardware parts:
- Camera
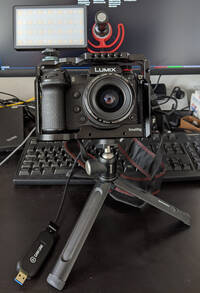
- If a camera is at hand (e.g. DSLR), which is able to output HDMI (check using a TV / screen) or USB tethering, using it can improve the video quality drastically
- An affordable solution to connect this camera on Windows/Linux/MacOS are USB 3 UVC capture devices which need no drivers or binary software to work
- BMD DeckLink capture cards are also a good option
- USB tethering (see below camera section) usualy provides a lower resolution and image quality than HDMI out but you still get better image as with most webcams.
- More expensive or slightly less suitable hardware is available, but may still help Framegrabber / Scaler
- If you don't want to show slides and only need a video of you, you can use a phone or tablet without going through OBS. See this howtos for android or iPhone / iPad.
- If you only want slides and can display it on you phone / tablet you can use laric screencaster on android to stream slides and sound from you phone / tablet. But this is only a last resort if you don't have a computer.
- Tripod
- A tripod is handy to give the camera the right angle and position
- As you are not going to do many camera movements, cheap tripods are fine as long as they are able to carry the weight of your camera
- Headset / Microphone
- Even very cheap (~25€) / entry level PC headsets work very well in quiet rooms
- Headsets also often include a speaker, which can be used for talk back e.g. for Q&A
- Directed on camera mics do also work well for this use case as long as there is not to much ambient noise
- Using the microphone in the camera instead of built-in laptop microphones can help a lot
- Light
Recommended Hardware
Webcams with decent quality
Webcams nowadays usually come with a built-in microphone. This is usually a step up compared with laptop microphones / cameras. Some webcams can output the video already in H.264/H.265 compressed, JPEG compressed or RAW video format.
Selecting a different mode can improve the quality but sadly most applications don't support this.
Webcams usually have a poorer quality compared to video / photo cameras, mostly because of the very tiny sensor and cheap lens.
You will always want a good light source when using a webcam.
| Manufacturer | Model | Connector | Maximum Resolution | |
|---|---|---|---|---|
| Logitech | C920 HD PRO Webcam | USB | 1920×1080 (FullHD) | Provides internal mic. Better than most Laptop built-ins, but narrower sound pickup preferred. |
| Logitech | Brio | USB 2/3 | 4k@30fps, 1080p@30,60 | 65, 78 and 90 degrees Field of View, Autofocus, two omni-directional microphones |
Cameras with HDMI output / USB tethering
Many consumer and professional photo (and of course video) cameras these days can put out a live video image via HDMI. In general this is always a better option than a webcam.
Many cameras limit the recording time to 30 minutes because of tax reasons (or for protection of the high price video camera market).
The recording limit is not a big issue as you can record on the PC but you need to test if your cam is overheating in the time your lecture will take.
Also some cameras get very warm (perhaps even hot) over time and shut them self down. E.g. the Sony Alpha III needs to be configured to ignore the lower temperature warning even if you are not recording on the camera itself or it will shut down.
Also not all cameras are able to put out a clean image with no menus or icons in the output signal. Some cameras allow this to be configured via settings.
For some cameras you can get firmware modifications that allow a clean feed output to be enabled.
| Manufacturer | Model | Connector Video | USB tethering | Connector Audio | Clean Output | Maximum Resolution | 30 min rec limit | Comment |
|---|---|---|---|---|---|---|---|---|
| BlackMagic | PocketCinema 4k | HDMI | no | mini XLR | Yes [1] | 1920×1080 (FullHD) | no | |
| BlackMagic | Pocket Cinema Camera 6K | HDMI | no | mini XLR | Yes [1] | 6144×3456 | no | |
| Canon | 250D | Mini-HDMI | untested | 3.5 mm (Stereo) | Yes | 4K | yes | |
| Canon | 550D | Mini-HDMI | yes (1056×704) | 3.5 mm | Yes [1] [2] | 1920×1080 (FullHD) | yes | probably overheats after ~30 min when streaming via HDMI tested by monoxyd, with USB thethering and original canon firmware capture is possible for at least a hour (the battery didn't allow for longer tests) (tested with GPhoto) |
| Canon | 600D | Mini-HDMI | yes (1056×704) | 3.5 mm | Yes [1] [2] | 1920×1080 (FullHD) | yes | Image has black borders, with ML the image has smaler borders. Magic Lantern needed for clean view. Parallel recording on camera will reduce resolution on HDMI. Fake Battery with power supply needed to not run on battery |
| Canon | 70D | Mini-HDMI | yes (1104 x 736) | 3.5 mm | No | 1920×1080 (FullHD) | yes | Letterbox Overlay can't be turned off in Canon firmware. |
| Canon | 5D Mark III | Mini-HDMI | ? | 3.5 mm | Yes [1] | 1920×1080 (FullHD) | ? | Since Firmware 1.2.1 5D Mark III can now be upgraded (for free) to capture clean, uncompressed YCbCr 4:2:2 8-bit digital video. Uncompressed footage will be sent with embedded time code over the camera’s HDMI output while it simultaneously displays the video on the rear LCD and records it to its memory cards. |
| Fuji | X-T2 | Micro-HDMI | win / linux ? | ? | Yes | 1920×1080 (FullHD) | ? | Battery-Mode only. Mains current feed requires Fujifilm VG-XT2 battery handgrip. X-T3 is probably similar, but with UHD and normal HDMI connector (to be verified). |
| Nikon | D750 | Mini-HDMI | no | 3.5mm | Yes [1] | 1920×1080 (FullHD) | no | |
| Panasonic | AG-UX90 | HDMI | no | XLR | Yes [1] | 3840 × 2160 (UHD 1) | no | During internal recording HDMI Resolution is limited to 1920×1080 (FullHD). |
| Panasonic | HDC-SD66 | Mini-HDMI | no | none | Yes [1] | 1920×1080 (FullHD, Interlaced), 720×576 (DVD, progressive) | no | FullHD Signal is interlaced. No Microphone input. Icons can be turned off in Menu via Settigs > Ext-Display > Off. |
| Panasonic | HDC-SD909 | Mini-HDMI | no | 3.5 mm | Yes [1] | 1920×1080 (FullHD) | no | Camera icons displayed in HDMI-out can be hidden by pressing the 'EXT DISPLAY' button on the remote. Rotating the Display by 180 degree (so that the display is showing in direction of the camera lens) also turns off the overlay. This overrides the settinge set by remote. There seems to be no menu option for this. |
| Panasonic | HC-X909 | Mini-HDMI | no | 3.5 mm | Yes [1] | 1920×1080 (FullHD) | no | Camera icons displayed in HDMI-out can be hidden by pressing the 'EXT DISPLAY' button on the remote. Rotating the Display by 180 degree (so that the display is showing in direction of the camera lens) also turns off the overlay. This overrides the settinge set by remote. There seems to be no menu option for this. |
| Panasonic | HC-X1 | HDMI | no | XLR | Yes [1] | 3840 × 2160 (UHD 1), 4096 × 2160 (4K) | no | During internal recording HDMI Resolution is limited to 1920×1080 (FullHD). Probably the same as AG-UX180. |
| Panasonic | DC-S1 | HDMI | win / linux inital support | 3.5 mm / XLR | Yes [1] | 3840 × 2160 (UHD 1) | no | Optional dual XLR audio preamp. |
| Panasonic | DC-S5 | Micro-HDMI | win / linux inital support | 3.5 mm / XLR | Yes [1] | 3840 × 2160 (UHD 1) | for 4k 10bit | Optional dual XLR audio preamp. |
| Panasonic | DC-GH4 | Micro-HDMI | photo only | 3.5 mm / XLR | Yes [1] | 3840 × 2160 (UHD 1) | yes | Dual SD slot. Optional dual XLR audio preamp. 4:2:2 10-bit or 8-bit HDMI. Optional SDI / XLR kit |
| Panasonic | DC-GH4R | Micro-HDMI | photo only | 3.5 mm / XLR | Yes [1] | 3840 × 2160 (UHD 1) | yes | Dual SD slot. Optional dual XLR audio preamp. 4:2:2 10-bit or 8-bit HDMI. Optional SDI / XLR kit |
| Panasonic | DC-GH5 | HDMI | win / linux ? / osx ? | 3.5 mm / XLR | Yes [1] | 3840 × 2160 (UHD 1) | no | Dual SD slot. Optional dual XLR audio preamp. 4:2:2 10-bit or 8-bit HDMI, https://www.youtube.com/watch?v=oqWofspD6BA |
| Panasonic | DC-GX80 | Micro-HDMI | ? | 3.5 mm | Yes [1] | 3840 × 2160 (UHD 1) | ? | |
| Sony | Alpha III | Micro-HDMI | ? | 3.5 mm | Yes [1] | 3840 × 2160 (UHD 1) | yes | Gets very hot over time. |
| Sony | FDR-AX100E | Micro-HDMI | ? | ? | Yes [1] | 3840 × 2160 (UHD 1) | ? | During internal recording, HDMI-out is blank in UHD → Change resolution to 1920×1080 (FullHD), HDMI out is active during recording |
| Sony | Alpha 6100 | Micro-HDMI | ? | 3.5 mm microphone | Yes [1] | 3840 × 2160 (UHD 1) 30 fps / 1920×1080 (FullHD) 60 fps | no | |
| Sony | Alpha 6600 | Micro-HDMI | ? | 3.5 mm microphone in and monitor out | Yes [1] | 3840 × 2160 (UHD 1) 30 fps / 1920×1080 (FullHD) 60 fps | no |
[1] camera icons displayed in HDMI-out can be hidden by menu.
[2] needs Magic Lantern
For more information on cameras supporting clean output over HDMI see also:
Firmware mods:
- Canon
Tools to get a live image from cams via USB
-
- third party tools for win/osx
Headsets and Microphones
In most situations a headset gives the speaker the most freedom to move while keeping the microphone at the correct (or at least constant) distance to his mouth.
The main draw break is the viewer can see it. Depending if a talk back to the speaker e.g. for Q&A should be possible a headset is the best option.
If no talk back is necessary also directed mics e.g. placed on the camera can be used. A silent room is recommended as this microphones pick up more ambient noise.
Also lavalier (mics attached to your chest / collar) are an option. They require a lot of discipline (e.g. not touching it, not move to much etc etc) but can be use full
if you have a huge beards that interferes with the headset and you don't have a directed mic.
| Type | Manufacturer | Model | Connector | Capsule Typ | Comment | Link |
|---|---|---|---|---|---|---|
| headset | logitech | h370 | USB | decent entry level USB headset for quiet rooms | https://www.logitech.com/en-us/product/h370-usb-headset-noise-canceling-mic | |
| directed | Røde | videomic | 3.5 mm jack | cardioid condenser microphone capsule | decent on cam mic for about 40€, comes with decoupling holder and windshield | https://www.rode.com/microphones/videomicro |
| lavalier | Røde | Røde Wireless GO | 3.5 mm jack | omnidirectional | wireless set: lightweight transmitter with microphone and receiver ~180€ | https://www.thomann.de/de/rode_wireless_go.htm |
| headset | Røde | Røde HS2-P Large | 3.5 mm jack | omnidirectional | headset fits to Røde Wireless GO ~240€ | https://www.thomann.de/de/rode_hs2_p_large.htm |
| directed | Røde | Røde podcaster | USB | Niere | Table / Arm mic, ~220€ so only if you need it often | https://de.rode.com/microphones/podcaster |
| headset | HyperX | Cloud Alpha S | USB | bidirektional | Gaming Headset, but very good mic quality ~100€ | https://www.hyperxgaming.com/de/headsets/cloud-alpha-s-gaming-headset |
| headset | HyperX | Cloud II | USB / 3.5mm jack (Speaker / Mic combined) | condenser (back electret) | Gaming Headset, but very good mic quality ~100€ | https://www.hyperxgaming.com/de/headsets/cloud-gaming-headset |
| directed | M-Audio | Uber Mic | USB | 3-capsule condenser | Table / Arm mic, ~100€ | https://m-audio.com/ubermic |
| lavailer | Sennheiser | AVX-MKE2 set | XLR with 3.5mm adapter included | omnidirectional | wireless headset using DECT, excellent quality but expensive | https://en-de.sennheiser.com/camera-wireless-lavalier-microphone-system-set-avx-mke2 |
Open Broadcast Software (OBS)
OBS Operation
Within OBS we provide three composite modes which the speaker can choose from.
We aim here for simplicity while also delivering a similar experience to the stream viewers “as usual”.
(NOTE: the files for this are not ready yet but feel free to play around and design some your self in the meantime)
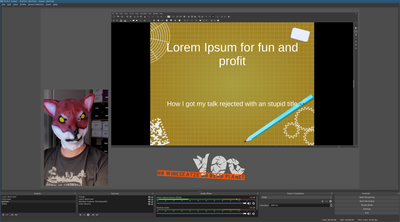
The lecture view shows the video of the speaker with the slides next to it.
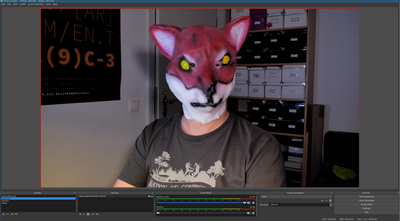
The fullscreen view shows only the speaker. Most useful if there are no slides or for example the speaker is introducing itself.
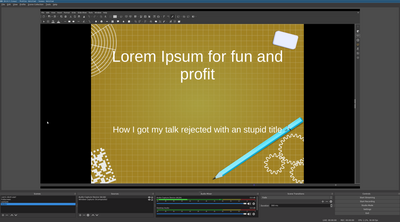
The slides view shows the slides in fullscreen. Most useful when there is a lot of small text on the slides or a video is presented.
OBS Settings
If possible a GPU / hardware video encoder should be used to make sure we don't run into a high CPU load. On nearly all modern Intel CPUs this just works. NVidia and AMD(ATI) GPUs might or might not work. Have a look at Video Acceleration.
The setting in OBS differs a little from OS to OS but you will get it. Only choose the CPU based encoder if you have no other option.
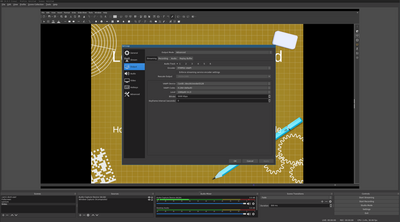 GPU encoding
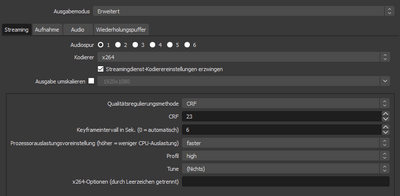 CPU encoding
- Set the encoder to FFMPEG VAAPI (linux / Intel GPU) (On Win/OSX this has a different name look for VAAPI / NVenc)
- Set the codec to h264
- Set the profile to the highest level you can select
- Set the bit-rate to 5000 Kbps (If your internet up-link is smaller than 10Mbit you might need a lower value here.)
We also ask you to record your talk to your hard disk. We will also record your stream but your local recording will also be there when the internet connection dies or something bad happens on our side. Therefore also configure the recording settings.
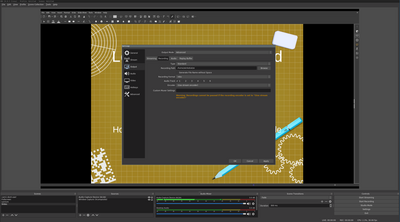
- Select a Recording Path to a location where you have some free disk space (10Gb should be enough)
- Select mkv as Recording Format
- Select “use stream encoder” as Encoder (Only if needed to choose a low bit-rate it might be useful to select a second encoder here with a higher bitrate.)
To send your talk out into the interwebs you also need to configure the streaming endpoint. You will get a URL from us / the event organisation to fill in here.
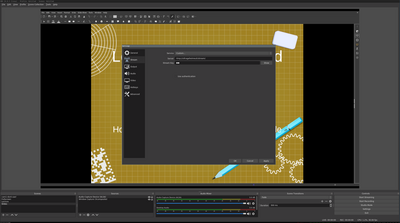
Fake Webcam
If you want to use the ouput of OBS in a group telco solution like jitsi you can do this with a “fake webcam”. Depending on your OS there are different solutions for this:
Your Studio
- The camera should be above or next to the screen on which you run your presentation. This will make it easy for you to look into the camera.
- If you can, have 2 screens one for OBS one for your presentation. If that is not possible you can switch between the windows or just select one composition in OBS and use it for the whole talk. Hotkeys may also be an option.
- Don't use WIFI as uplink for your computer if possible. Video streaming and packet loss are not good frinds.
- Make sure you don't have your passwords, a private picture or something else you don't want to show to the whole Internet behind you. A white wall, a nice scarf or a chaos flag are good options.
- Sound that echos back from empty walls sucks. If you are not using a headset (or it's still hally) try to cover the walls with things that absorb sound.
- You need light. If you have windows the sun will (most likely) change its position so you will not have a constant light source. This can be annoying. You should place some lamps somewhere and especially something that shines on your face.
- If you use a real camera there are some things you should set:
- Select a low focal length. This will make the background a little blurry and sets the focus on the important thing, you!
- You should have at least 25 frames per second. (Which means your exposure time should be set below 1/25 second.)
- Auto focus is usually not your friend. If you are not planning moving around use manual focus.
- White balance should be set according to your light source. Don't use auto white balance (AWB). The camera could change the white balance when you change your slide because the light emitted by the screen in front of you changes.
Basic setup for Heralds
Should your event have Heralds or others that introduce speakers and ask questions after the talk, the setup is similar for them, however one screen with OBS is enough, since they usually will not present slides.
Heralds will stream their feed to the same endpoint as the speakers. At the endpoint directing decision (which feed to show) can be made.
For providers of RTMP Endpoints
The following instructions are for those who want to operate their own streaming server. Speakers or Heralds at distributed events do not need this.
But why not use...
But first a few words on “Why not use Skype/GotoMeeting/Jitsi/Cisco …”: What all this services have in common is that they are designed as many-to-many communication tools.
The implementation differs from solution to solution, but they all have in common that they alter resolution / bit-rate and other parameters as they think it's best. In our tests this always resulted in sub-optimal video quality. They also need either a central server relaying the video, or work on a peer-2-peer base which means a lot of upload bandwidth is needed on the presenter side.
Therefore we recommend solutions where speakers stream their video in a fixed video quality to a distribution server, and a CDN does the distribution. In our case it's our own CDN, but you can e.g. use the YouTube streaming service for free.
If you just looking for a video telco solution have a look at https://jitsi.org/ or BBB and host an instance yourself. Below you find some hints how to connect the setup described here to any telco solution.
